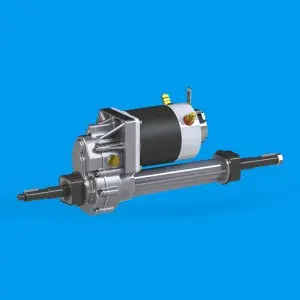
The transaxle is an important part of a vehicle’s drivetrain, responsible for transmitting power from the engine to the wheels. It combines the functions of transmission, axle and differential into one integrated unit. One common problem that can occur with a transaxle is a faulty clutch linkage, which can lead to difficult shifting and poor overall performance. In this article, we’ll look at how to repair the clutch linkage in your transaxle, providing a step-by-step guide to fixing the problem and ensuring your vehicle runs smoothly.
Identify the problem:
Before attempting to repair the clutch linkage in the transaxle, it’s important to first identify the problem. Symptoms of a failed clutch linkage may include difficulty engaging gears, a spongy or loose clutch pedal, or grinding noises when shifting gears. If you notice any of these signs, your clutch linkage may need attention.
Gather the necessary tools:
To begin the repair process, gather the necessary tools and equipment. You may need a set of wrenches, pliers, a jack and jack stands, and possibly a flashlight for visibility. It’s also important to have your vehicle’s service manual on hand for reference, as it will provide specific instructions for your specific make and model.
Locate the clutch connecting rod:
The next step is to position the clutch linkage inside the transaxle. This may require access to the underside of the vehicle, so be sure to use a jack to safely lift the car and secure it with jack stands. Once under the vehicle, use a flashlight to locate the clutch linkage, which is usually connected to the clutch pedal and clutch release mechanism.
Check for damage or wear:
Carefully inspect the clutch linkage for any signs of damage, wear, or misalignment. Look for worn or broken parts, loose connections, or any accumulation of dirt and debris that could affect the operation of the connecting rod. It is important to thoroughly evaluate the condition of the connecting rod to determine the extent of repairs needed.
Adjust or replace parts:
Depending on the specific problem found, you may need to adjust or replace certain components of the clutch linkage. This may involve tightening loose connections, lubricating moving parts, or replacing worn bushings, pivot points, or the clutch cable itself. See your service manual for detailed instructions on how to properly adjust or replace these components.
Test clutch operation:
After making any necessary adjustments or replacements, it’s important to test clutch operation to make sure the problem is resolved. Once the vehicle is safely raised, depress the clutch pedal and shift gears to verify that the linkage is functioning properly. Pay attention to the feel of the clutch pedal and the ease of shifting to confirm that the problem has been resolved.
Reassemble and lower the vehicle:
Once you’ve confirmed that the clutch linkage is working properly, reassemble any components that were removed during the repair. Double-check all connections and fasteners to make sure everything is secure. Finally, carefully lower the vehicle from the jack stands and remove the jack to make sure the vehicle is stable and secure before taking it for a test drive.
Get professional help if needed:
If you encounter any challenges during the repair process or are unsure how to proceed, it is best to seek professional help. A certified mechanic or automotive technician will have the expertise and experience to properly diagnose and repair clutch linkage problems in the transaxle, keeping your vehicle running safely and reliably.
In summary, fixing a faulty clutch linkage in your transaxle is an important aspect of vehicle maintenance and can greatly impact your vehicle’s overall performance and drivability. By following the steps outlined in this article and being diligent with the inspection and repair process, you can effectively repair clutch linkage issues in your transaxle and enjoy smooth and efficient operation of your vehicle. Remember, if you encounter any challenges along the way, always prioritize safety and consult your vehicle’s service manual or consult a professional.
Post time: Apr-01-2024


