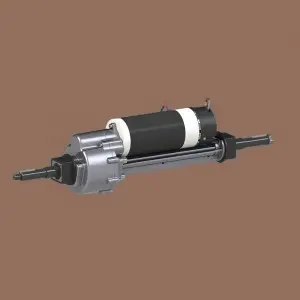
The transaxle is an important part of a vehicle’s drivetrain, responsible for transmitting power from the engine to the wheels. It is critical to ensure that the transaxle seal is properly seated to prevent leaks and maintain the integrity of the system. In this article, we will discuss the importance of properly installing a transaxle seal and provide a step-by-step guide on how to achieve this.
Transaxle seals play a critical role in preventing fluid leaks in the transaxle housing. It is designed to create a tight seal between the transaxle and driveshaft, ensuring transmission fluid remains within the system. Properly installed transaxle seals are critical to maintaining proper fluid levels and preventing contamination of transmission components.
When the transaxle seal is not seated properly, it can cause fluid to leak, causing the transaxle components to lose lubrication. This can cause excessive wear and damage to the transaxle, resulting in expensive repairs and potential safety hazards. Additionally, fluid leaks can lead to environmental pollution, as transmission fluid is harmful to the environment.
To ensure that the transaxle seal is properly seated, it is important to follow the correct steps during installation. Here are the steps to properly install a transaxle seal:
Prepare the work area: Before starting the installation process, make sure the work area is clean and free of any clutter. This will help prevent contamination of the transaxle seal and ensure proper sealing.
Remove the old seal: If there is an existing transaxle seal, carefully remove it using a seal puller or flat-blade screwdriver. Be careful not to damage the transaxle housing during this process.
Clean the seating surface: After removing the old seal, thoroughly clean the seating surface of the transaxle housing. Use a clean rag and a mild solvent to remove any dirt, debris, or old sealant from the surface.
Inspect Seals and Case: Before installing the new transaxle seal, inspect the seal and transaxle case for any signs of damage or wear. It is important to make sure the seal is in good condition and that the case does not have any nicks or burrs that might prevent a proper seal.
Lubricate: Apply a thin layer of transmission oil or a suitable lubricant to the inner lip of the transaxle seal before installation. This will help the seal slide into place smoothly and prevent damage during installation.
Install Seal: Carefully place the new transaxle seal onto the transaxle housing, making sure it is properly aligned. Use a seal driver or appropriately sized socket to gently tap the seal into place. Be careful not to use excessive force or you may damage the seal or housing.
Verify proper seating: Once the seal is in place, visually inspect to ensure it is flush with the transaxle housing. There should be no gaps or unevenness between the seal and the housing, indicating a proper seal.
Reassemble components: With the transaxle seal properly seated, reassemble any components that were removed during installation. This may include driveshafts, axles, or other related parts.
By following these steps, you can ensure that the transaxle seal is properly seated, preventing fluid leaks and maintaining the integrity of the transaxle system. It’s important to note that proper transaxle seal installation is critical to the overall performance and longevity of your vehicle’s driveline.
In summary, the transaxle seal is a critical component of the vehicle’s driveline and must be properly seated to prevent fluid leakage and maintain the integrity of the transaxle system. By following the step-by-step guide outlined in this article, you can install your transaxle seal efficiently and avoid potential problems associated with improper installation. Remember, proper maintenance and attention to detail during installation are keys to ensuring optimal performance and longevity of your transaxle system.
Post time: Apr-03-2024


