
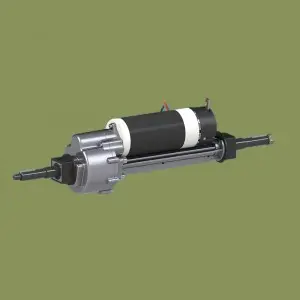
If you’re the proud owner of a Cub Cadet gear transaxle, you may find yourself needing to take it apart for maintenance or repairs. The transaxle is an important part of the Cub Cadet and is responsible for transmitting power from the engine to the wheels. Over time, wear and tear can cause damage to the transaxle, requiring disassembly for inspection, cleaning, or replacement of parts. In this article, we’ll guide you through the process of taking apart your Cub Cadet gear transaxle and provide step-by-step instructions to help you complete the task with confidence.
Before you begin, it is important to gather the necessary tools and equipment. You will need a socket set, wrenches, pliers, rubber hammer, gear puller, torque wrench, and safety gear such as gloves and goggles. Also, make sure to have a clean work space and adequate lighting to facilitate the disassembly process.
Step 1: Prepare
First make sure the Cub Cadet is off and the transaxle is cool to the touch. Place the vehicle on a flat, level surface and engage the parking brake to prevent any unexpected movement. It’s also a good idea to disconnect the battery to eliminate the risk of electric shock during disassembly.
Step 2: Drain the liquid
Locate the drain plug on the transaxle and place a drain pan underneath. Use a wrench to loosen the drain plug and carefully remove it, allowing the fluid to drain completely. Properly dispose of old fluids according to local regulations. This step is critical to prevent any spills or leaks during disassembly and reassembly of the transaxle.
Step 3: Remove the wheels
To remove and install the transaxle, you need to remove the wheels. Use the socket set to loosen the lug nuts and carefully lift the wheel off the vehicle. Place the wheels aside in a safe location and make sure they do not obstruct your work area.
Step 4: Disconnect the drive shaft
Locate the driveshaft connected to the geared transaxle and use a wrench to loosen the bolt holding it in place. After removing the bolts, carefully disconnect the driveshaft from the transaxle. Note the orientation of the drive shaft for reassembly.
Step 5: Remove the transaxle housing
Use a socket set to remove the bolts that secure the transaxle housing to the frame. After removing the bolts, carefully lift the transaxle housing away from the vehicle, taking care not to damage any surrounding components. Place the transaxle housing on a clean work surface, making sure it is stable and safe.
Step 6: Remove Transaxle
With the transaxle housing removed, you can now begin removing the geared transaxle. Begin by carefully removing the retaining clips, pins, and bolts holding the transaxle components together. Use pliers and a rubber mallet to gently tap and manipulate the components to ensure they separate without causing damage.
Step 7: Inspect and Clean
When removing the transaxle, take the opportunity to inspect each component for signs of wear, damage, or excessive debris. Clean components thoroughly using a suitable solvent and brush to remove any built-up dirt or contaminants. This step is critical to ensuring optimal function of the transaxle after reassembly.
Step 8: Replace worn parts
If you find any worn or damaged parts during your inspection, it’s time to replace them. Whether it’s gears, bearings, seals or other components, make sure you have the correct replacement parts on hand before reassembling. It is important to use genuine Cub Cadet parts to maintain the integrity and performance of your transaxle.
Step 9: Reassemble the transaxle
Carefully reassemble the geared transaxle in the reverse order of disassembly. Pay close attention to the orientation and alignment of each component to ensure they are seated and secured correctly. Use a torque wrench to tighten bolts to manufacturer’s specifications to prevent over-tightening or under-tightening.
Step 10: Refill Liquid
Once the gear transaxle has been reassembled, it will need to be refilled with the appropriate fluid. Refer to the Cub Cadet manual for recommended fluid types and amounts. Use a funnel to carefully pour the fluid into the transaxle, making sure it reaches the correct level.
Step 11: Reinstall Transaxle Housing and Wheels
After the geared transaxle has been reassembled and filled with fluid, carefully lift the transaxle housing back into position on the frame. Secure it in place using the bolts and fasteners you removed earlier. Reattach the driveshaft and reinstall the wheel, tightening the lug nuts to the manufacturer’s specifications.
Step 12: Test and Inspect
Before taking your Cub Cadet for a test drive, it’s important to test the transaxle to make sure it’s working properly. Engage the transmission and watch for smooth, consistent wheel movement. Listen for any unusual noises or vibrations that may indicate a problem. Also, check for leaks around the transaxle housing and driveshaft connection.
By following these step-by-step instructions, you can confidently take apart your Cub Cadet gear transaxle for maintenance or repair. Remember to be organized and focused, taking the time to inspect, clean, and replace any worn parts as needed. Proper maintenance of your gear transaxle will help extend its service life and ensure your Cub Cadet maintains peak performance for years to come.
Post time: Apr-24-2024