
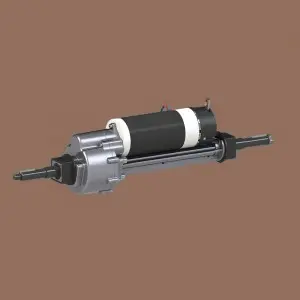
If you’re a DIY enthusiast or a small engine repair expert, you may find yourself needing to rebuild your Murray transaxle. The transaxle is an important part of a riding lawn mower or lawn tractor and is responsible for transferring power from the engine to the wheels. Over time, wear and tear can take its toll on the transaxle, resulting in reduced performance and efficiency. Rebuilding your Murray transaxle can help restore its functionality and extend its life. In this article, we’ll discuss the steps to rebuild a Murray transaxle, as well as some tips and precautions to remember.
Before starting the rebuilding process, it is important to gather the necessary tools and equipment. You will need a socket set, wrenches, pliers, rubber hammer, torque wrench, bearing puller, and a transaxle rebuild kit for your Murray model. Additionally, make sure you have a clean and well-lit workspace so that the rebuilding process can occur efficiently.
The first step in rebuilding your Murray transaxle is to remove it from your riding lawn mower or lawn tractor. This usually involves disconnecting the drive belt, removing the rear wheels, and releasing the transaxle from the chassis. After removing the transaxle, place it on a workbench and clean the outside thoroughly to prevent any dirt or debris from getting into the internal components during removal.
Next, carefully remove the transaxle, paying attention to the orientation and location of each component. Start by removing the transaxle case cover and inspect the gears, bearings, and other internal parts for any signs of damage or excessive wear. It is important to document the disassembly process by taking photos or marking components to ensure proper reassembly later.
After inspecting the internal components, replace any damaged or worn parts with new parts from the rebuild kit. This may include gears, bearings, seals and gaskets. It is important to use the correct replacement parts specific to your Murray transaxle model to ensure proper fit and function. Also, before reassembling the transaxle, lubricate the gears and bearings with a high-quality gear oil or grease.
When reassembling the transaxle, pay close attention to the torque specifications of the bolts and fasteners. Use a torque wrench to tighten the bolts to the manufacturer’s recommended torque value to prevent over-tightening or under-tightening, which may cause premature component failure. Also, make sure all gaskets and seals are properly seated to prevent any leaks once the transaxle returns to service.
After reassembling the transaxle, reinstall it back on your riding lawn mower or lawn tractor by reversing the removal process. Make sure all links, linkages, and straps are properly reconnected and adjusted according to manufacturer’s specifications. After reinstalling the transaxle, refill it with the recommended amount and type of gear oil and test the mower to make sure the transaxle is functioning properly.
In addition to the rebuilding process, there are some important tips and precautions to remember when dealing with a Murray transaxle. First, be sure to refer to the manufacturer’s service manual for detailed instructions and specifications specific to your transaxle model. This will ensure you have the right information and guidance throughout the rebuilding process.
Second, when disassembling and reassembling the transaxle, proceed slowly and methodically. Rushing through the process can result in errors or overlooking important details that can affect the performance and safety of the transaxle.
Additionally, safety should be a top priority when working on any mechanical component. Always wear appropriate personal protective equipment, such as gloves and safety glasses, to protect yourself from any potential hazards. Also, be aware of any sharp edges or hot surfaces when handling transaxle components.
Finally, if you encounter any difficulty or uncertainty during the rebuild process, seek the help of a professional mechanic or small engine repair specialist immediately. They can provide valuable insight and guidance to ensure the transaxle is rebuilt correctly and functioning optimally.
In summary, rebuilding your Murray transaxle is a beneficial and cost-effective way to restore functionality to your riding lawn mower or lawn tractor. By following the correct procedures, using the correct tools and replacement parts, and observing safety precautions, you can successfully rebuild your Murray transaxle and extend its life. Whether you’re a DIY enthusiast or a small engine repair expert, there’s something very satisfying about seeing a rebuilt transaxle put into service.
Post time: May-01-2024