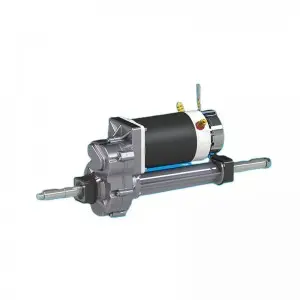
The transaxle is a key component of your sweeper, responsible for transmitting power from the engine to the wheels. Over time, the transaxle may need maintenance or replacement due to wear and tear. Removing a sweeper’s drive shaft can be a complicated task, but with the right tools and knowledge, it can be done effectively. In this article, we will discuss the steps to remove the sweeper drive shaft and provide some tips for a successful removal process.
Step 1: Gather necessary tools and equipment
Before beginning the transaxle removal process, it is important to gather all necessary tools and equipment. This may include jacks and jack stands, socket sets, pry bars, hammers, torque wrenches, and any other specific tools required for your specific sweeper model. Additionally, it is important to wear appropriate safety gear, such as gloves and safety glasses, to protect yourself during disassembly.
Step 2: Lift the sweeper and secure it on jack stands
To access the drive shaft, the sweeper needs to be lifted off the ground. Use a jack to lift the sweeper, and then secure it to the jack stand to ensure stability and safety during disassembly. Be sure to follow the manufacturer’s guidelines for lifting and securing the sweeper to prevent any accidents or vehicle damage.
Step 3: Remove the wheel and brake assembly
Once the sweeper is securely lifted and supported on jack stands, the next step is to remove the wheel and brake assembly to gain access to the drive shaft. Start by loosening the lug nuts on the wheel using a lug wrench, then lift the wheel off the axle and set it aside. Next, remove the brake caliper and rotor to expose the driveshaft. This may require the use of a socket set and a pry bar to carefully remove the component without causing damage.
Step 4: Disconnect the driveshaft from the transmission
With the driveshaft exposed, the next step is to disconnect it from the transmission. This may involve removing any mounting bolts or clamps that secure the axle to the transmission. Carefully loosen and remove the bolts using the socket set and torque wrench, taking care to note their location and dimensions for reassembly later.
Step 5: Remove the driveshaft from the hub
After disconnecting the transaxle from the transmission, the next step is to remove it from the hub. This may require using a hammer and pry bar to carefully remove the axle from the hub. When removing the shaft from the hub, be careful not to damage surrounding components.
Step 6: Inspect the drive shaft and replace if necessary
After removing the drive shaft from the sweeper, take a moment to inspect it for any signs of damage or wear. Look for any cracks, bends, or other issues that might indicate the need for replacement. If the drive shaft shows signs of wear or damage, be sure to replace it with a new or refurbished shaft to ensure continued performance and safety of your sweeper.
Step 7: Reassemble the sweeper
After inspecting or replacing the transaxle, the final step is to reassemble the sweeper. This involves reconnecting the driveshaft to the transmission and wheel hub, as well as reinstalling the brake components and wheels. Use a torque wrench to make sure all bolts are tightened to the manufacturer’s specifications, and double-check that everything is securely in place before lowering the sweeper off the jack stands.
All in all, removing a sweeper’s drive shaft is a complex task that requires careful attention to detail and the use of the right tools and equipment. By following the steps outlined in this article and taking the time to inspect and replace the transaxle when necessary, you can ensure continued performance and safety of your sweeper. If you are unsure about any aspect of the driveshaft removal process, it is best to consult a professional mechanic or refer to the manufacturer’s guidelines for your specific sweeper model. With proper care and maintenance, your sweeper’s drive shaft will continue to provide reliable power transmission for years to come.
Post time: May-04-2024


