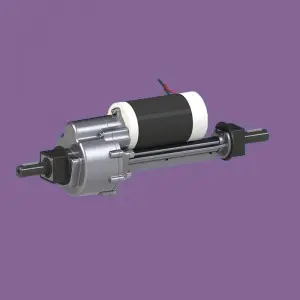
Are you experiencing problems with your vehicle’s transaxle? Don’t worry; we’ve got you covered! In this blog post, we’ll guide you through the step-by-step process of replacing a transaxle. A transaxle is an important part of a vehicle’s drivetrain, responsible for transferring power from the engine to the wheels. By following these instructions carefully, you can save time and money by making the replacement yourself. So let’s get started!
Step 1: Gather Necessary Tools and Materials
Before starting the replacement process, make sure you have all the necessary tools and materials on hand. These typically include hydraulic jacks, jack stands, socket wrenches, pliers, torque wrenches, drain pans and suitable replacement transaxles.
Step Two: Safety First
Make sure your vehicle is in a safe and secure location, away from traffic and on level ground. Engage the parking brake and, if possible, block the wheels for added safety.
Step 3: Remove the Battery and Disconnect the Components
Disconnect the negative terminal of the battery to avoid any risk of electric shock during replacement. Then, disconnect everything blocking the transaxle, including the intake system, exhaust system, and starter motor.
Step 4: Drain the Transmission Fluid
Locate the transmission oil drain plug and place a drain pan under it. Loosen the stopper and allow the liquid to drain completely. Dispose of used fluid responsibly in accordance with local regulations.
Step 5: Remove the Transaxle
Using a hydraulic jack, raise the vehicle high enough to gain access to and safely remove the transaxle. Securely support the vehicle with jack stands to prevent accidents. Follow the instructions specific to your model to remove the axle and clutch. Disconnect the wiring harness and all remaining transaxle connections.
Step 6: Install the Replacement Transaxle
Carefully position the replacement transaxle in place using a jack. Take care to properly align the axles and ensure proper fit. Reconnect all harnesses and connections, making sure everything is securely fastened.
Step 7: Reassemble Parts and Fill with Transmission Fluid
Reinstall any components that were previously removed, such as the starter motor, exhaust and intake systems. Use a funnel to add the correct amount and type of transmission fluid to the transaxle. See your vehicle manual for specific fluid recommendations.
Step 8: Test and Review
Before lowering the vehicle, start the engine and engage the gears to verify that the transaxle is working properly. Listen for any unusual sounds and check for leaks. Once you’re satisfied, carefully lower the vehicle and double check that all connections are tight.
in conclusion:
Replacing a transaxle may seem like a daunting task, but by following these step-by-step instructions, you can confidently do the job yourself. Remember to prioritize safety throughout the process, and refer to your vehicle manual for any model-specific instructions. By replacing the transaxle yourself, you not only save money, but also gain valuable knowledge about the inner workings of your vehicle. So get ready to roll up your sleeves and get ready to hit the road with a smooth and functioning transaxle!
Post time: Jul-24-2023


