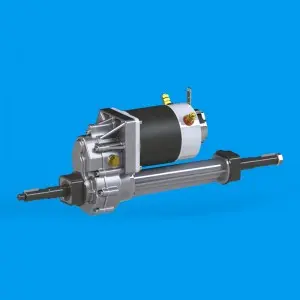
The Mendeola SD5 transaxle is a popular choice for mid-engine vehicles because of its durability and performance. Setting up the Mendeola SD5 transaxle for a mid-engine configuration requires careful attention to detail and precision to ensure optimal performance and reliability. In this article, we will discuss the steps and considerations involved in setting up a Mendeola SD5 transaxle for a mid-engine application.
The first step in setting up a Mendeola SD5 transaxle for a mid-engine vehicle is to ensure that the transaxle is compatible with the engine and chassis. The Mendeola SD5 transaxle is designed for use with a variety of engine and chassis configurations, but it is important to verify that the transaxle is suitable for a specific application. This may require consultation with a Mendeola specialist or engineer to ensure the transaxle is the correct choice for the vehicle.
Once transaxle compatibility is confirmed, the next step is to prepare the transaxle for installation. This includes inspecting the transaxle for any signs of damage or wear and resolving any issues that may be affecting its performance. Before proceeding with the installation process, it is important to ensure that the transaxle is in good working order.
The installation process begins with mounting the transaxle to the vehicle chassis. This may involve fabricating a custom mount or bracket to hold the transaxle in place. It is important to ensure that the transaxle is properly aligned and positioned within the chassis to prevent any issues with driveline angle or clearance.
With the transaxle securely installed, the next step is to connect the transaxle to the engine. This may involve installing a custom adapter plate or bellhousing to mate the transaxle to the engine. It is important to ensure that the mating surfaces are properly aligned and the connection is secure to prevent any misalignment or vibration issues.
With the transaxle connected to the engine, the next step is to tackle the driveline components. This may involve installing custom axles, constant velocity joints and driveshafts to connect the transaxle to the wheels. It’s important to make sure the drivetrain components are sized and configured correctly to handle the engine’s power and torque, and installed accurately to prevent any vibration or sticking issues.
With the transaxle and driveline components installed, the next step is to address the cooling and lubrication systems. The Mendeola SD5 transaxle requires proper cooling and lubrication to ensure optimal performance and longevity. This may involve installing a custom oil cooler, lines and fittings to ensure the transaxle is properly cooled and lubricated during operation.
With the cooling and lubrication systems in place, the final step is to tackle the shifter and clutch components. This may involve installing a custom shifter and linkage to ensure smooth and precise shifts, as well as installing the appropriate clutch assembly to handle the engine’s power and torque.
Throughout the installation process, close attention to detail must be paid and ensuring each component is installed with precision and care. This may require consulting a Mendeola specialist or engineer to ensure the transaxle is set up correctly and that all components are installed and configured correctly.
In summary, setting up the Mendeola SD5 transaxle for a mid-engine application requires careful planning and attention to detail. By following the steps outlined in this article and working with a Mendeola expert or engineer, you can achieve a reliable and high-performance transaxle setup for your mid-engine vehicle.
Post time: May-17-2024


