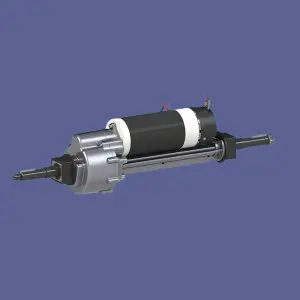
The transaxle is an important part of any vehicle, including the iconic Chevrolet Corvair. It is responsible for transferring power from the engine to the wheels, so it requires regular maintenance to ensure optimal performance and longevity. One of the key aspects of transaxle maintenance is proper maintenance and monitoring of transaxle fluid. In this article, we’ll explore the importance of transaxle oil, how to check and replace the transaxle oil in your Corvair, and the benefits of keeping this important component in top condition.
The transaxle oil in your Corvair plays a vital role in lubricating the internal parts of the transaxle, such as gears, bearings, and shafts. It also helps dissipate heat and reduce friction, which prevents premature transaxle wear. Over time, the transaxle fluid can become contaminated with dirt, debris, and metal particles, causing reduced lubrication and potential damage to transaxle components. This is why the transaxle oil in your Corvair must be checked and changed regularly.
First, you need to gather the tools and materials you need to complete the task. These include a jack and jack stands, drain pan, socket wrench set, new transaxle oil filter, and the right type of transaxle oil for your Corvair. Be sure to consult your vehicle’s manual or a trusted automotive resource to determine the correct transaxle fluid type for your specific model year.
Once you have the required materials, you can proceed to inspect and replace the transaxle oil in your Corvair. Start by safely raising the vehicle with a jack and supporting it with jack stands. Locate the transaxle oil pan, which is usually located underneath the vehicle. Place a drain pan under the transaxle fluid pan to catch the drained old fluid.
Using a socket wrench set, carefully remove the bolts that secure the transaxle oil pan to the transaxle case. When loosening the bolts, be aware of residual fluid that may leak. After removing the bolts, carefully lower the transaxle oil pan and allow the remaining oil to drain into the drain pan. Pay attention to the condition and color of the old transaxle oil, as this can provide valuable insight into the overall health of the transaxle.
With the transaxle oil pan removed, you will also have access to the transaxle oil filter. This component is responsible for trapping contaminants and debris, preventing them from circulating through the transaxle. Carefully remove the old filter and replace with the new one, making sure it is installed correctly and securely.
After replacing the filter, clean the transaxle oil pan thoroughly to remove any remaining debris or sludge. Check the pan for signs of excessive wear or damage, as this may indicate an underlying problem with the transaxle. Once the pan is clean and in good condition, reattach it to the transaxle case using the original bolts and torque specifications.
Once the transaxle oil pan is securely reinstalled, you can proceed to add new transaxle oil to the system. Refer to the vehicle manual or the specifications provided by the fluid manufacturer to determine the correct amount and type of fluid required. Using a funnel, carefully pour new transaxle oil into the transaxle oil pan, making sure it reaches the appropriate level as shown on the dipstick or filler port.
After adding the new transaxle fluid, start the engine and let it idle for a few minutes. This will help circulate fluid throughout the transaxle and ensure proper lubrication of internal components. After the engine idles, shift the transmission through each gear, pausing briefly in each position to allow fluid to flow through the system.
After cycling through the gears, return the transmission to neutral and recheck the transaxle fluid level. If necessary, add more fluid to reach the recommended level, then securely reinstall the dipstick or filler cap. Lower the vehicle off the jack stands and take a short test drive to make sure the transaxle is running smoothly and there are no signs of leaks or problems.
By following the steps below to check and replace the transaxle oil in your Corvair, you can help maintain the health and performance of this critical component. Regular transaxle fluid maintenance can extend the life of your transaxle, reduce the risk of expensive repairs, and ensure a smooth and reliable driving experience. Be sure to follow the recommended maintenance intervals listed in your vehicle’s manual and consult a qualified automotive professional if you have any questions about the condition of the transaxle or its fluids. With proper care and maintenance, your Corvair transaxle will continue to provide the performance and reliability enthusiasts have come to expect from this classic American car.
Post time: Jun-03-2024


