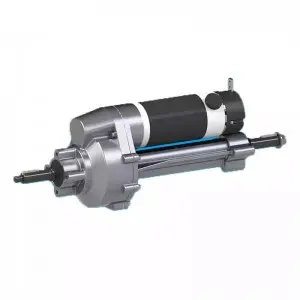
Transaxle removal is a complex and labor-intensive task that requires careful preparation and attention to detail. The transaxle is a key component in many front-wheel drive and all-wheel drive vehicles, combining the functions of the transmission and differential into a single unit. This article will guide you through the basic steps you should take before removing your transaxle to ensure a smooth and safe process.
Understand the transaxle
Before we dive into the preparatory steps, it’s important to have a basic understanding of what a transaxle is and its role in a vehicle. The transaxle is responsible for transferring power from the engine to the wheels, allowing the vehicle to move. It also manages the gear ratios and provides the necessary torque to the wheels. Given its vital role, careful handling of the transaxle is essential.
Step by step preparation
1. Gather necessary tools and equipment
Before you begin, make sure you have all the necessary tools and equipment. This includes:
- Complete set of wrenches and sockets
- screwdriver
- pliers
- Jacks and jack stands
- a transmission jack (if available)
- Drainage tray
- Safety glasses and gloves
- Service manual for your specific car model
Having the right tools on hand will make the process more efficient and reduce the risk of damage to the transaxle or other components.
2. Ensure safety first
Safety should always be your top priority when working on a vehicle. Here are some safety precautions to follow:
- Work in a well-ventilated area: Make sure your work space is well ventilated to avoid breathing in any harmful fumes.
- Use Jack Stands: Never rely solely on a jack stand to support your vehicle. Always use jack stands to secure the vehicle securely in place.
- Wear safety gear: Wear safety glasses and gloves to protect yourself.
- Disconnect the Battery: To prevent any electrical accident, disconnect the negative terminal of the battery.
3. Consult the maintenance manual
Your vehicle’s service manual is a valuable resource when removing the transaxle. It provides specific instructions and diagrams for your vehicle model. Follow the manual closely to avoid any mistakes and ensure you don’t miss any critical steps.
4. Drain the liquid
Before removing the transaxle, the transmission fluid needs to be drained. This step is essential to prevent spills and make the removal process cleaner. Here’s how to do it:
- Locate the drain plug: Refer to your service manual to locate the transmission drain plug.
- Place the drain pan: Place the drain pan under the drain plug to collect liquid.
- Remove the drain plug: Use a wrench to remove the drain plug and allow the fluid to drain completely.
- Replace the drain plug: After the fluid has drained, replace the drain plug and tighten.
5. Remove the axle
In most vehicles, the axle needs to be removed before accessing the transaxle. Follow these steps to remove the shaft:
- Lift the vehicle: Use a jack to lift the vehicle and secure it with jack stands.
- Remove Wheels: Remove the front wheel to gain access to the axle.
- Disconnect the axle nut: Use a socket and breaker bar to remove the axle nut.
- Remove Axle: Carefully pull the axle out of the transaxle. You may need to use a spudger to gently separate them.
6. Disconnect and wire
The transaxle is connected to various linkages and wiring harnesses that need to be disconnected before removal. Please follow these steps:
- Label the connections: Use masking tape and a marker to label each connection. This will make reassembly easier.
- Disconnect the shift linkage: Remove the bolt or clamp that secures the shift linkage to the transaxle.
- Unplug Wire Harnesses: Carefully unplug all wire harnesses connected to the transaxle. Be gentle to avoid damaging the connector.
7. Support engine
In many vehicles, the transaxle also supports the engine. Before removing the transaxle, the engine needs to be supported to prevent it from sagging or shifting. Here’s how:
- Using the Engine Support Rods: Place the engine support rods across the engine bay and secure them to the engine.
- Connect the support chain: Attach the support chain to the engine and tighten to provide adequate support.
8. Remove the transaxle bracket
The transaxle is fixed to the frame via mounting brackets. These mounts need to be removed before removing the transaxle. Please follow these steps:
- Locate the Mount: Refer to the service manual to locate the transaxle mount.
- Remove Bolts: Use a wrench to remove the bolts that secure the mount to the frame.
- Support the transaxle: Use a transmission jack or floor jack with wood to support the transaxle while the brackets are removed.
9. Lower the transaxle
With all necessary components disconnected and the transaxle supported, you can now lower it from the vehicle. Please follow these steps:
- Double Check Connections: Make sure all links, wiring, and mounts are disconnected.
- Lower the transaxle: Slowly and carefully lower the transaxle using a transmission jack or floor jack. Have an assistant help you if needed.
- Removing the transaxle: After lowering the transaxle, carefully slide it out from under the vehicle.
in conclusion
Transaxle removal is a challenging task that requires careful preparation and attention to detail. By following these steps and consulting your vehicle’s service manual, you can ensure a smooth, safe removal process. Remember to prioritize safety, gather the necessary tools, and take your time to avoid any mistakes. With the right approach, you’ll be well-prepared to tackle this complex car repair.
Post time: Sep-13-2024


